As always, a million thank yous to my grandma. She's the best!
(And for the numismatists out there, don't worry, we did hold on to a few of the more
special coins.)
Grilled Polenta slightly adapted from Mario Batali / Food & Wine
olive oil
2 cups polenta
6 cups water
salt
Lightly oil two glass baking dishes. In a medium saucepan,
bring 6 cups of water to a boil. Add 1 tablespoon of salt and slowly
whisk in the polenta. Cook over low heat, whisking constantly, until the
polenta is thick, about 5 minutes. Pour the hot polenta evenly into the two baking
dishes and cover the surface directly with plastic wrap. Let stand until
firm, about 25 minutes.
Light a grill and oil the grates. Cut the polenta into squares and
grill over moderately high heat until crisp and lightly charred, 5
minutes per side.
Tomato Sauce with Bacon and Onion via The Art of Simple Food
makes about 2 cups
Into a heavy pan over medium heat, pour: 2 tablespoons olive oil. Add 3 slices bacon (or pancetta),
cut into 1/4-inch pieces. Cook until the fat is rendered and the meat
is lightly browned. Remove the meat and set aside. Add to the fat left
in the pan: 1 large onion, peeled and sliced thin.
Cook, stirring now and then, until soft, about 10 minutes. Add: 6 ripe medium tomatoes, peeled, seeded, and chopped, or 8 canned whole tomates, drained and chopped. Add salt to taste.
Cook
for 10 minutes over low heat. Add the reserved bacon and cook for
another 2 or 3 minutes. Taste for salt and adjust as needed.
[Serve squares of polenta topped with sauce and grated Parmesan.]
Grilled Pancetta-Wrapped Asparagus via Gourmet
1 pound medium asparagus (1/2 inch thick; 12 to 15)
1 tablespoon extra-virgin olive oil
12 to 15 thin slices pancetta
Equipment: 4 (12-inch) wooden skewers, soaked in water 30 minutes
Prepare a grill for direct-heat cooking over medium-hot charcoal (medium-high heat for gas).
Trim asparagus to 6 inches long, then toss with oil and
1/4 tsp pepper in a small dish. Wrap middle of each asparagus with 1
slice of pancetta. Thread 3 or 4 wrapped asparagus 1/2 inch apart onto
each skewer.
Oil grill rack, then grill asparagus, uncovered,
turning, until pancetta is golden brown in spots and asparagus is
crisp-tender, about 6 minutes.
Showing posts with label success. Show all posts
Showing posts with label success. Show all posts

8/1/12
Plum Kuchen


This Is Just To Say
by Amelia Carlos Amelias
I have eaten
the plum kuchen
that was on
the countertop
and which
you were probably
saving
for breakfast
Forgive me
it was delicious
so sweet
and so warm


serves 8
1 (1/4-ounce) package active dry yeast
1/4 cup warm water (105–110°F)
2 cups plus 2 tablespoons all-purpose flour, divided
1 cup sugar, divided
1/2 teaspoon salt
1/2 cup plain whole-milk yogurt (preferably Greek-style) at room temperature
1 large egg, warmed in shell in warm water 5 minutes
1 1/2 teaspoons grated lemon zest
1 teaspoon pure vanilla extract
1 1/4 sticks unsalted butter, cut into tablespoons and softened, divided
3/4 lb firm-ripe plums (about 4 small), halved and pitted (Though feel free to substitute with any other stone fruit!)
Stir together yeast and warm water in mixer bowl and let stand until foamy, about 5 minutes. (If mixture doesn’t foam, start over with new yeast.)
Add 2 cups flour, 2/3 cup sugar, salt, yogurt, egg, zest, and vanilla to yeast mixture and mix at medium-low speed 1 minute. Beat in 1 stick butter, 1 Tbsp at a time, until incorporated. Beat at medium speed until dough is smooth and shiny, about 5 minutes. (Dough will be very sticky.) Scrape down side of bowl and sprinkle dough with remaining 2 Tbsp flour. Cover bowl with a kitchen towel (not terry cloth) and let dough rise in a draft-free place at warm room temperature until doubled, 1 1/2 to 2 hours.
Spread remaining 2 Tbsp butter in bottom of a 9-inch square baking pan and sprinkle with remaining 1/3 cup sugar. Cut each plum half into 5 or 6 slices and arrange in 1 layer in pan.
Stir dough until flour is incorporated, then spread evenly over plums. Loosely cover with buttered plastic wrap, then kitchen towel. Let rise in a draft-free place at warm room temperature until almost doubled, about 1 1/2 hours.
Preheat oven to 375°F with rack in middle.
Bake until kuchen is golden-brown and a wooden pick inserted into center comes out clean, 30 to 35 minutes. Cool in pan 5 minutes, then invert and unmold onto a rack to cool completely.
COOKS’ NOTE: Kuchen is best the day it is baked but can be kept, loosely covered, at room temperature 1 day.
6/4/12
Sombremesa de Banana com Queijo
Here’s something you don’t eat everyday.


Also, Matt and I are moving, (More on this exciting, life-stage leaping development later! No, I’m not pregnant.) and one of the first decisions I made after entering escrow was that this elderly can of sweetened condensed milk that’s been in the cupboard for longer than I’d care to admit will not be making the trip to the new house with us. (That’s right, cupboard lingerers. You know who you are and your time is up.)

 Hey, here’s a tip! You might want to stir the sweetened
condensed milk and the evaporated milk together before boiling. I combined the
two milks, added a cinnamon stick, turned the heat on to medium, and then
decided to vacuum the bedroom. Why do I do these things? Also, while we’re on
the topic of painful questions: Why must Shawn Johnson retire? What an
Olympic-sized bummer.
Hey, here’s a tip! You might want to stir the sweetened
condensed milk and the evaporated milk together before boiling. I combined the
two milks, added a cinnamon stick, turned the heat on to medium, and then
decided to vacuum the bedroom. Why do I do these things? Also, while we’re on
the topic of painful questions: Why must Shawn Johnson retire? What an
Olympic-sized bummer.

I
just got home from a dear friend’s wedding/long weekend in Pittsburgh. And while I loved spending time with so many people that I haven’t seen in
years, crying tears of nuptial joy, and being treated to multiple sushi
dinners by my mom and grandma, this morning, I woke up craving my
routine—my morning coffee, hiking, avocado-centric lunches, and the making of foods.
I
came across this banana and cheese pudding in the most recent issue of
Saveur, and try as I might, I couldn’t resist attempting it. Never mind that
I just made a giant layer cake, that Matt and I are “trying to be healthier,” and that I’m deathly allergic to bananas (not true).
Also, Matt and I are moving, (More on this exciting, life-stage leaping development later! No, I’m not pregnant.) and one of the first decisions I made after entering escrow was that this elderly can of sweetened condensed milk that’s been in the cupboard for longer than I’d care to admit will not be making the trip to the new house with us. (That’s right, cupboard lingerers. You know who you are and your time is up.)
Point being, if you’re not training for the Olympics, you
should make this dessert. It’s the sort of thing Ina Garten would make
if she were Brazilian—a dulce-de-leche-esque pudding with bananas and pockets
of molten cream cheese, which perfectly cuts all that sweetness. What’s that, Ina? How bad can that be? Well, apart from the super-burnt pan, not bad at all!

1 12. oz. can evaporated milk
1 stick cinnamon
4 ripe bananas, cut crosswise into 2 inch pieces, then lengthwise in 1/4-inch thick slices
12 oz. cream cheese, cubed
1/4 tsp. ground cinnamon
Heat oven to 350 degrees. Boil milks and cinnamon stick in 12-inch nonstick skillet over medium heat until reduced by half, about 30 minutes; discard cinnamon. Spread 1/3 reduced milk over bottom of an 8x8 baking dish; top with half the bananas and half the cream cheese. Repeat layering, ending with reduced milk; sprinkle with ground cinnamon. Bake until bubbly, about 30 minutes. (A prettier presentation, as they show in their photo—second one from top—might be to layer all of this into individual oven-safe ramekins and then bake them.)
Sombremesa de Banana com Queijo (Banana and Cheese Pudding) via Saveur
1 14 oz. can sweetened condensed milk1 12. oz. can evaporated milk
1 stick cinnamon
4 ripe bananas, cut crosswise into 2 inch pieces, then lengthwise in 1/4-inch thick slices
12 oz. cream cheese, cubed
1/4 tsp. ground cinnamon
Heat oven to 350 degrees. Boil milks and cinnamon stick in 12-inch nonstick skillet over medium heat until reduced by half, about 30 minutes; discard cinnamon. Spread 1/3 reduced milk over bottom of an 8x8 baking dish; top with half the bananas and half the cream cheese. Repeat layering, ending with reduced milk; sprinkle with ground cinnamon. Bake until bubbly, about 30 minutes. (A prettier presentation, as they show in their photo—second one from top—might be to layer all of this into individual oven-safe ramekins and then bake them.)
5/28/12
Yellow Layer Cake with Vanilla Frosting


Happy birthday, Matt! Now, let's watch Game of Thrones and eat another slice.

Yellow Layer Cake with Vanilla Frosting via Food and Wine
Cake3 cups sifted all-purpose flour, plus more for dusting
1 tablespoon baking powder
3/4 teaspoon salt
1 cup milk, at room temperature
2 teaspoons pure vanilla extract
1 1/2 sticks unsalted butter, softened
2 cups granulated sugar
4 large eggs, at room temperature
Frosting
1/2 pound unsalted butter, softened
1 large egg yolk (optional)
1 pound confectioners' sugar (If I could do it all over again, I'd leave out at a couple of ounces of sugar. The icing is very sweet.)
1/4 cup plus 2 tablespoons heavy cream
1 teaspoon pure vanilla extract
Pinch of salt
Preheat the oven to 350°. Butter two 9-by-2-inch round cake pans and line with parchment paper; butter and dust with flour. In a bowl, mix the 3 cups of flour, baking powder and salt. In a cup, mix the milk with the vanilla.
In a standing mixer fitted with the paddle, beat the butter at medium speed until light and creamy. Add the sugar and beat until fluffy, 4 minutes. Beat in the eggs, one at a time, scraping down the bowl. Beat in the dry ingredients in 3 batches, alternating with the milk mixture and scraping down the bowl.
In a standing mixer fitted with the whisk, beat the butter and egg yolk at medium-high speed until creamy. Beat in the sugar at low speed. Beat in the cream, vanilla and salt, then beat at medium-high speed until fluffy, 3 minutes longer.
Spread 1 cup of frosting over a cake layer and top with the second layer; frost the top and sides. Let stand 1 hour; serve.
5/11/12
Video Attempt: Mother's Day Special
I love my mom as much as the next gal (unless the next gal has a horrible mom and does not love her), but that doesn't mean that she and I drink the same amount of Diet Coke, wear the same amount of diamond jewelry, or eat chocolate éclairs the same way. Of course, that's really beside the point. The point is that my mom and I made éclairs, and they were fantastic. So, thanks, Mom—for visiting and cooking with me and letting Matt capture the magic on camera. You've always supported all of my weird projects and for that, and everything else, I love you! Happy Mother's Day.
Chocolate Éclairs slightly adapted from Hugh Fearnley-Whittingstall and Fizz Carr's The River Cottage Family Cookbook
makes about 12
(Instead of thick pastry cream, Hugh and Fizz stuff their éclairs with whipped cream. I personally think this was a great idea.)
5 tablespoons butter
7/8 cup water
a pinch of salt
scant 2/3 cup all-purpose flour
3 free-range eggs
1 cup heavy cream (+ 2 teaspoons of sugar if you want to sweeten your whipped cream a bit.)
For the chocolate icing:
1/2 cup superfine sugar
6 tablespoons water
2 oz. dark chocolate
2 tablespoons unsalted butter
1. Preheat oven to 400F. Dice the butter, put it in the medium saucepan with the water and salt, and turn the heat to low. Stir from time to time with the wooden spoon as the butter melts. Meanwhile, sift the flour into a small bowl.
2. When the butter has melted, turn up the heat and bring the mixture to a boil. Turn off the heat and quickly add the flour to the saucepan. Immediately beat the flour into the liquid with the wooden spoon to mix all the ingredients together. After a few seconds or so, you'll find that the mixture swells into a smooth dough that comes away from the sides of the saucepan. Stop beating.
3. Remove the pan from the heat. Let the mixture cool for 3 or 4 minutes. Crack the eggs into the medium bowl and whisk them with the fork. Pour a little of the egg into the flour mixture and beat it in well. Keep adding and beating in the egg, a little at a time, until the dough looks thick, smooth, and shiny and still holds its shape well. You may not need the last 2 or 3 tablespoons of egg if your eggs are large ones.
4. If you happen to have an éclair pan, spoon the mixture into the éclair pan, keeping in mind that these things are going to puff up like crazy so you don't need much dough per éclair. If you don't have an eclair pan: spoon the mixture into a freezer bag (you'll need to scrape it out of the pan with a plastic spatula). Fold down the top of the bag to squeeze the dough to the bottom. Snip off one of the bottom corners of the bag to give you a hole about 3/8 inch long. Line two baking sheets with parchment paper. Squeeze the mixture into sausage shapes about 4 inches long onto the parchment, allowing about 1 1/2 inches of space between each one (they should at least double in size in the oven). You should be able to make about 12.
5. Oven gloves on. (That's what Hugh and Fizz calls them. Kinda cute.) Place the baking sheets in the hot oven and leave for about 30 minutes. When the éclairs are ready, they should be puffed up, a good golden brown all over, and feel hard when you poke one with a knife. Oven gloves on again. Take out the baking sheet and turn off the oven.
6. Immediately take each éclair off the sheets and, with the point of a knife, gently slit the side to let out the steam. (Otherwise the steam sits trapped in the eclair and turns back to water, leaving you with a soggy pastry.) Let them cool and dry out on the wire rack.
7. Whip the cream in the small bowl with the whisk (adding the two teaspoons of sugar if you're adding it, about halfway through) until it's just thick enough to hold its shape. Put it in the fridge while you make the chocolate icing.
8. For the icing, put the sugar and water in a small saucepan, place it in the stove, and turn the heat to low. Heat gently, stirring all the time with a wooden spoon to dissolve the sugar. Bring to a boil and boil fast for 3 minutes. Remove the pan from the heat and wait for a few minutes for the syrup to cool down (you can speed this up by dipping the bottom of the pan in a bowl of cold water, if you like). Meanwhile, break up the chocolate and cut the butter into chunks.
9. When the syrup is very warm, rather than very hot, add the chocolate and butter. Stir until both have melted and blended to a smooth, glossy sauce. Let cool, stirring occasionally. When the sauce starts to thicken, it's ready to ice your eclairs.
10. When the pastries are cool, use a teaspoon to fill the inside of each éclair with whipped cream (you may need to enlarge the slit that you made before). Then take a different teaspoon and smear the chocolate icing generously over each eclair. Leave the eclaris on the wire rack until the icing has set. In the unlikely event that you're not going to eat them straight away, you can put them in the fridge for a few hours.
Chocolate Éclairs slightly adapted from Hugh Fearnley-Whittingstall and Fizz Carr's The River Cottage Family Cookbook
makes about 12
(Instead of thick pastry cream, Hugh and Fizz stuff their éclairs with whipped cream. I personally think this was a great idea.)
5 tablespoons butter
7/8 cup water
a pinch of salt
scant 2/3 cup all-purpose flour
3 free-range eggs
1 cup heavy cream (+ 2 teaspoons of sugar if you want to sweeten your whipped cream a bit.)
For the chocolate icing:
1/2 cup superfine sugar
6 tablespoons water
2 oz. dark chocolate
2 tablespoons unsalted butter
1. Preheat oven to 400F. Dice the butter, put it in the medium saucepan with the water and salt, and turn the heat to low. Stir from time to time with the wooden spoon as the butter melts. Meanwhile, sift the flour into a small bowl.
2. When the butter has melted, turn up the heat and bring the mixture to a boil. Turn off the heat and quickly add the flour to the saucepan. Immediately beat the flour into the liquid with the wooden spoon to mix all the ingredients together. After a few seconds or so, you'll find that the mixture swells into a smooth dough that comes away from the sides of the saucepan. Stop beating.
3. Remove the pan from the heat. Let the mixture cool for 3 or 4 minutes. Crack the eggs into the medium bowl and whisk them with the fork. Pour a little of the egg into the flour mixture and beat it in well. Keep adding and beating in the egg, a little at a time, until the dough looks thick, smooth, and shiny and still holds its shape well. You may not need the last 2 or 3 tablespoons of egg if your eggs are large ones.
4. If you happen to have an éclair pan, spoon the mixture into the éclair pan, keeping in mind that these things are going to puff up like crazy so you don't need much dough per éclair. If you don't have an eclair pan: spoon the mixture into a freezer bag (you'll need to scrape it out of the pan with a plastic spatula). Fold down the top of the bag to squeeze the dough to the bottom. Snip off one of the bottom corners of the bag to give you a hole about 3/8 inch long. Line two baking sheets with parchment paper. Squeeze the mixture into sausage shapes about 4 inches long onto the parchment, allowing about 1 1/2 inches of space between each one (they should at least double in size in the oven). You should be able to make about 12.
5. Oven gloves on. (That's what Hugh and Fizz calls them. Kinda cute.) Place the baking sheets in the hot oven and leave for about 30 minutes. When the éclairs are ready, they should be puffed up, a good golden brown all over, and feel hard when you poke one with a knife. Oven gloves on again. Take out the baking sheet and turn off the oven.
6. Immediately take each éclair off the sheets and, with the point of a knife, gently slit the side to let out the steam. (Otherwise the steam sits trapped in the eclair and turns back to water, leaving you with a soggy pastry.) Let them cool and dry out on the wire rack.
7. Whip the cream in the small bowl with the whisk (adding the two teaspoons of sugar if you're adding it, about halfway through) until it's just thick enough to hold its shape. Put it in the fridge while you make the chocolate icing.
8. For the icing, put the sugar and water in a small saucepan, place it in the stove, and turn the heat to low. Heat gently, stirring all the time with a wooden spoon to dissolve the sugar. Bring to a boil and boil fast for 3 minutes. Remove the pan from the heat and wait for a few minutes for the syrup to cool down (you can speed this up by dipping the bottom of the pan in a bowl of cold water, if you like). Meanwhile, break up the chocolate and cut the butter into chunks.
9. When the syrup is very warm, rather than very hot, add the chocolate and butter. Stir until both have melted and blended to a smooth, glossy sauce. Let cool, stirring occasionally. When the sauce starts to thicken, it's ready to ice your eclairs.
10. When the pastries are cool, use a teaspoon to fill the inside of each éclair with whipped cream (you may need to enlarge the slit that you made before). Then take a different teaspoon and smear the chocolate icing generously over each eclair. Leave the eclaris on the wire rack until the icing has set. In the unlikely event that you're not going to eat them straight away, you can put them in the fridge for a few hours.
5/4/12
Ghormeh Sabzi


Tannaz gave me some menu options and an education. Here are
some things I learned: For Persian rice, you typically have two options: polo
or chelo. Polo has things cooked into it and chelo is plain white rice with
saffron that you serve with khoresh (stew). I was about to say whichever one
has the crispy rice, but she cut me off at the pass: Don’t freak out,
Amelia; they both have the crispy rice layer. (She didn't really say it like that.)
As for the khoresh, there seemed to be a world of options.
We could make karafs, which included celery and tons of herbs. We could do
fesenjan, which was walnuts and pomegranate. There was gheime, a tomato-based
khoresh with split peas and shoestring fried potatoes on top (Keep talking, I’m
interested.) But hey, what about aloo esfenaj? That one highlights prunes and
spinach and is both sweet and sour. But there was one khoresh option that reigned
supreme, ghormeh sabzi, which Tannaz explained as “probably the Iranian
national dish.” For ghormeh sabzi, you use tons of fresh herbs, which you fry, before then stewing them for a long, long time with beans and/or meat.


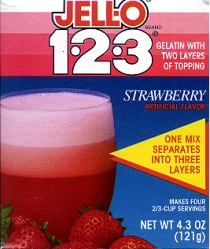
You take the widest bottomed pan you have and add a bit of oil, water, and saffron. Then you add just some of the parboiled rice and mix it up with the oil, water, and saffron combination. I believe this is when Tannaz brought up Jello 1-2-3, and I looked at her blank-faced, but now I get it. Chelo is totally like Jello 1-2-3. See, the bottom layer of rice that’s mixing with the oil and saffron is set to be the tah-dig; then there is the middle, which is less crispy but nice and saffrony; and then the top is white and fluffy / the perfect base for khoresh! Chelo 1-2-3! I get it!


In case the photos haven’t proved it yet, this meal was delicious. The ghormeh sabzi was citrusy, meaty, herby, and
subtly sour all at once—a flavor profile I don’t really run into in my everyday
life. And of course there was the rice, the beautiful, beautiful rice.

And while we’re on the topic of gratitude, thanks to
everyone who voted for Bon Appetempt. Believe it or not, we won a Saveur Food Blog Award for the second year in a row! I for one can’t really believe it. So,
thank you, thank you, thank you.
 Ghormeh Sabzi via
Tannaz's adaption of the recipe from New Food of Life: Ancient Persian and Modern Iranian Cooking and Ceremonies
Ghormeh Sabzi via
Tannaz's adaption of the recipe from New Food of Life: Ancient Persian and Modern Iranian Cooking and Ceremonies

("Fresh Herb Khoresh" as the book calls it.)
(Herb portions can be hazy--the more the merrier!)
1 bunch Persian chives (can substitute, or subsidize with 1 bunch scallions, green part only)
3 bunches flat-leaf parsley
1/2 bunch fenugreek
1/2 C spinach (optional)
3 Tbs olive or other vegetable oil
(Herb portions can be hazy--the more the merrier!)
1 bunch Persian chives (can substitute, or subsidize with 1 bunch scallions, green part only)
3 bunches flat-leaf parsley
1/2 bunch fenugreek
1/2 C spinach (optional)
3 Tbs olive or other vegetable oil
1 1/2 lb beef shank, cut into 2x2 inch cubes, against the
grain
1 Small onion, finely diced
1 tsp ground turmeric
4-6 Dried lemons ('limoo Omani')
1/4 C fresh lime or lemon juice
1/2 can kidney beans, drained.
Remove any thick stems from herbs, and, in a food processor,
finely chop them.
In a large pot or Dutch oven, sauté 1 tablespoon oil,
turmeric, meat, and onions over med-high heat for about 10 minutes, stirring
occasionally, until meat is browned. Season with salt and pepper
(Note: we used kosher meat, which is salted before you buy it. This
is why we didn't salt during this step. Non-kosher meat, you'd want to
salt, though, you'll have plenty of opportunity to adjust). Add dried
lemons and enough water to cover the mixture by one inch to the pot. Bring
to a boil, then cover and simmer while you fry the herbs.
Meanwhile, in a large sauté pan, fry herbs with remaining
oil over medium heat, stirring occasionally, until the aroma of frying herbs
rises, about 20 minutes.
Add herbs and lime juice to pot and stir to combine.
Increase heat to return to a boil, then reduce heat and simmer, covered, for at
least another 2 hours.
In the last 10 minutes or so of cooking, stir in kidney
beans and adjust seasoning.
Serve over steamed basmati rice.
4/17/12
Video Attempt: Bon Appétempt Goes to Paris
As per usual with these things, I'll begin with an apology: I'm sorry that I wasted the roe. While watching this video, I got a deep pang of regret that I didn't try to cook/eat that portion of the coquilles (scallops). Also, this video marks the end to our Parisian wrap-ups. Yes, it's back to the real world, Los Angeles, avocados, and hot sauce. Not a bad place to be.
Keller writes: "I always buy big scallops, graded U7, which means there are 7 of this size in a pound, and for this dish, we brine them to season them all the way through."
(Even though I essentially halved this recipe in the video, here, I'm giving you Keller's recipe as it was originally printed, since I honestly don't know what size our scallops were and can't even remember how much we bought in terms of weight. Sorry! We were on vacation?)
2 cups kosher salt, plus more to taste
2 cups hot water
8 cups cold water
12 U7 sea scallops (about 1 3/4 pounds; see headnote), preferably dry-packed, tough side muscle removed from each one
About 2 tablespoons (1 ounce) Clarified Butter*
1/2 lemon (optional)
Line a small baking sheet with paper towels. Combine the 2 cups salt with the hot water in a large bowl, stirring to dissolve the salt. Add the cold water.
Add the scallops to the brine and let stand for 10 minutes (no longer, or the scallops may become too salty). Drain the scallops, rinse under cold water, and arrange in a single layer on the paper towels.
Heat the clarified butter in a large stainless steel frying pan over medium-high heat until it ripples and begins to smoke. (Although you may be tempted to use a nonstick pan, a stainless steel pan will produce a more beautiful caramelized exterior.) Sprinkle the scallops lightly with salt and add them to the pan, without crowding. (If necessary, cook the scallops in two pans or in 2 batches; if they touch, they will steam rather than caramelize.) Cook, without moving the scallops, until the bottoms are a rich golden brown, 3 to 3 1/2 minutes. Turn the scallops and caramelize the second side.
Transfer the scallops to a serving platter and serve with a squeeze of lemon juice on top, if desired.
*This is from me, Amelia. To clarify butter, melt 3 tablespoons on the stove top and then skim off or pour off the clear yellow, liquid component, leaving behind as much of the white milk solid part as possible. The clear yellow stuff is what you want. For a much much better how-to and description, check out Mr. Lebovitz's site.
Arugula Salad with Lemon Dressing
4 tablespoons extra-virgin olive oil2 tablespoons fresh lemon juice (or more to taste)
salt and pepper
1 bunch/bag of arugula
Parmesan cheese
1 bunch/bag of arugula
Parmesan cheese
I like this dressing really lemony, so I start with about 4 tablespoons of of olive oil and 2 tablespoons freshly squeezed lemon juice in a small bowl or, as showcased, glass. Add a few healthy pinches of kosher salt and a few dashes of pepper. Stir it up and taste it. If it's too tart, I add more olive oil. Not tart enough, I add more lemon. You get the idea. Once it tastes delicious, I pour it over the arugula and toss with some grated Parmesan. If you have tomatoes on hand, sure, throw some in there too.
4/12/12
We Went to Paris

Mes amis! I hope you're ready for a photographic tour of our trip because that's exactly what's about to happen... Stay tuned next week for the Paris video attempt!!




2. Giant painting at the Pompidou.
3. We may not have stepped inside of the Louvre, but it sure did look pretty from the outside.
4. Enjoying a King Falafel Palace falafel because L'as Du Fallafel was closed, and I wasn't about to leave the Marais without having sampled some falafel/fallafel. (In super controversial news, we went back another day and tried L'as Du Fallafel, and I must say that although they were both crazy delicious, I preferred King Falafel Palace! Hate mail?)
5. The Seine.
6. Galerie Salon, the best tiny store we ever stumbled upon (4 rue de Bourbon le Chateau) that carried Astier de Villatte. Matt got a tiny cup and bowl (see iPhone pic round up), and I got the most amazing incense.
7. The famous marionette theater in Luxembourg Gardens. Matt saw The Three Little Pigs. (I stayed outside and enjoyed the gardens, which brings us to our next photo...)
8. Seriously, do make it to Luxembourg Gardens if you're in Paris. It is the most exquisite park I've ever visited. (And bonus: it costs zero Euro!)
9. Piece of crepe.
10. Leave it to the Parisians to turn a median strip into something beautiful.
11. One of the few pictures of us together! (At Versailles.)
12. The famous Ladurée. (Look closely and you'll see evidence of their unexpected partnership with Hello Kitty.)
13. On day two, Matt thought he was ordering French fries and was brought this: an apple tarte with a side of ice cream. Whoooops.
14. Louis XIV. This guy greets you as you walk into Versailles. What a host!
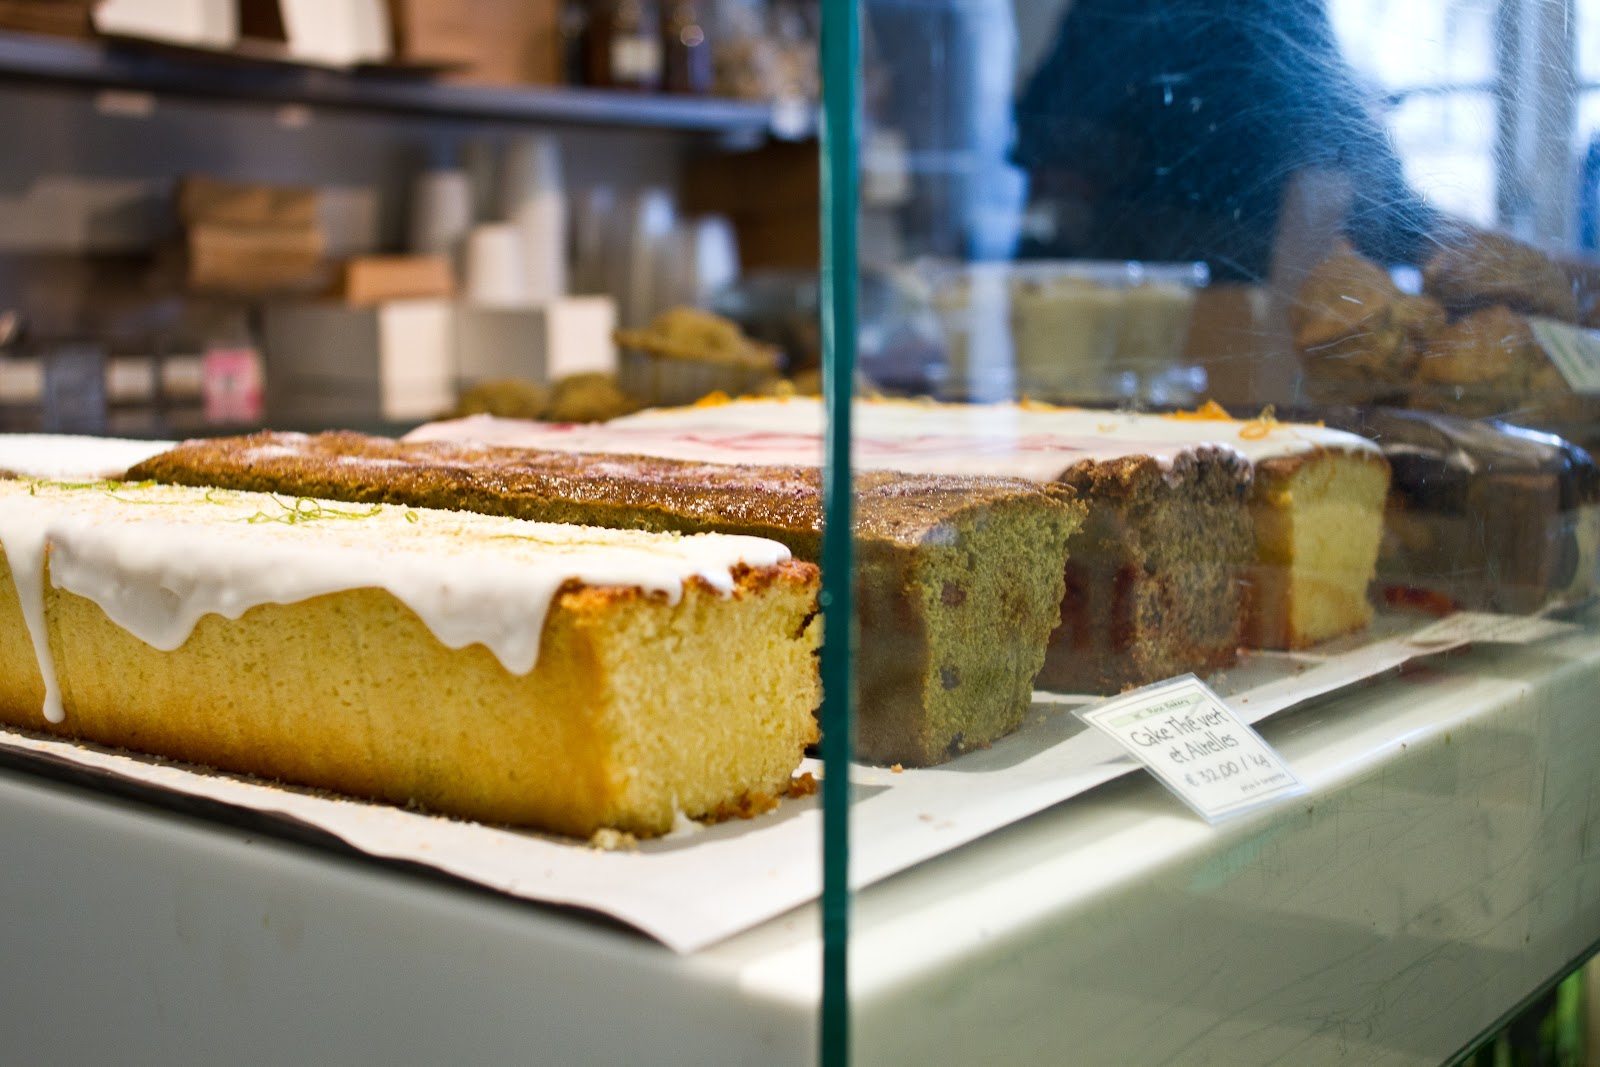
15. In the back room of the original Rose Bakery.
16. The cakes at Rose Bakery.
17. Hall of awesome at Versailles.
18. Obligatory Paris shot; a photo from the Versailles gardens that although he took, Matt doesn't like because "It looks like a Cialis ad." And: even the street lights in Paris are pretty.
19: These pigeons across from our apartment were as big as soccer balls.
20. Scary fish at the market.
21. Fact: all the chimneys in Paris wear bonnets.
22. A mini iPhone photo round up.
p.s. Bon Appétempt was nominated for a Saveur food blog award (Best Food Humor)! Thanks so much to those of you who nominated this little operation. Voting goes through April 26th, so head on over and vote for your favorites!
I'll see you next week with the video!
Subscribe to:
Posts (Atom)